
Here is a quick walkthrough deploying a simple Kubernetes cluster from Rancher RKE using a cloud.ca plugin for Terraform. This tutorial will deploy a Kubernetes cluster compose of a single Master node, 2 Worker nodes, a kubectl configuration file on your workstation so you can securely manage your apps over a VPN connection.
Overview of RKE
Rancher Kubernetes Engine (RKE) is a CNCF-certified Kubernetes distribution that runs entirely within Docker containers. It works on bare-metal and virtualized servers. RKE solves the problem of installation complexity, a common issue in the Kubernetes community. With RKE, the installation and operation of Kubernetes is both simplified and easily automated, and it’s entirely independent of the operating system and platform you’re running. As long as you can run a supported version of Docker, you can deploy and run Kubernetes with RKE.
Prerequisites
Install Terraform
On your workstation, Install Terraform and make sure it is placed in your binary folder such as /usr/local/bin/ as executable for Linux/OSX:
Terraform Plugins
Download and install Terraform plugins for RKE and cloud.ca:
To download the latest Terraform plugins:
- https://github.com/rancher/terraform-provider-rke/releases
- https://github.com/cloud-ca/terraform-provider-cloudca/releases
- https://github.com/cloud-ca/terraform-provider-cloudca/releases
On a Linux workstation, the following would apply:
mkdir -p ~/.terraform/plugins
cd /tmp

wget https://github.com/cloud-ca/terraform-provider-cloudca/releases/download/v1.5.0/terraform-provider-cloudca_v1.5.0_linux-amd64.zip
wget https://github.com/yamamoto-febc/terraform-provider-rke/releases/download/0.14.1/terraform-provider-rke_0.14.1_linux-amd64.zipunzip terraform-provider-cloudca_v1.5.0_linux-amd64.zip -d~/.terraform.d/plugins
unzip terraform-provider-cloudca_v1.5.0_linux-amd64.zip -d ~/.terraform.d/plugins
unzip terraform-provider-rke_0.14.1_linux-amd64.zip -d ~/.terraform.d/plugins

rm terraform-provider-cloudca_v1.5.0_linux-amd64.zip
rm terraform-provider-rke_0.14.1_linux-amd64.zip
Remote Management VPN
We use the VPC Remote Management VPN service to create a secure connection between your workstation and VMs. This avoid the need to create port forwarding rules for SSH over the Internet.
Create/Connect to your cloud.ca VPN. In your cloud.ca portal, go to:
Go to services -> <region name> -> <environment name> -> networking -> click on your VPC -> Remote access VPN (in the left menu)
For additional help on accessing your VPN go to: https://help.cloud.ca/hc/vpn
Terraform vars
First you will need to collect your api_key and id's.
To get your API key got to your portal interface.
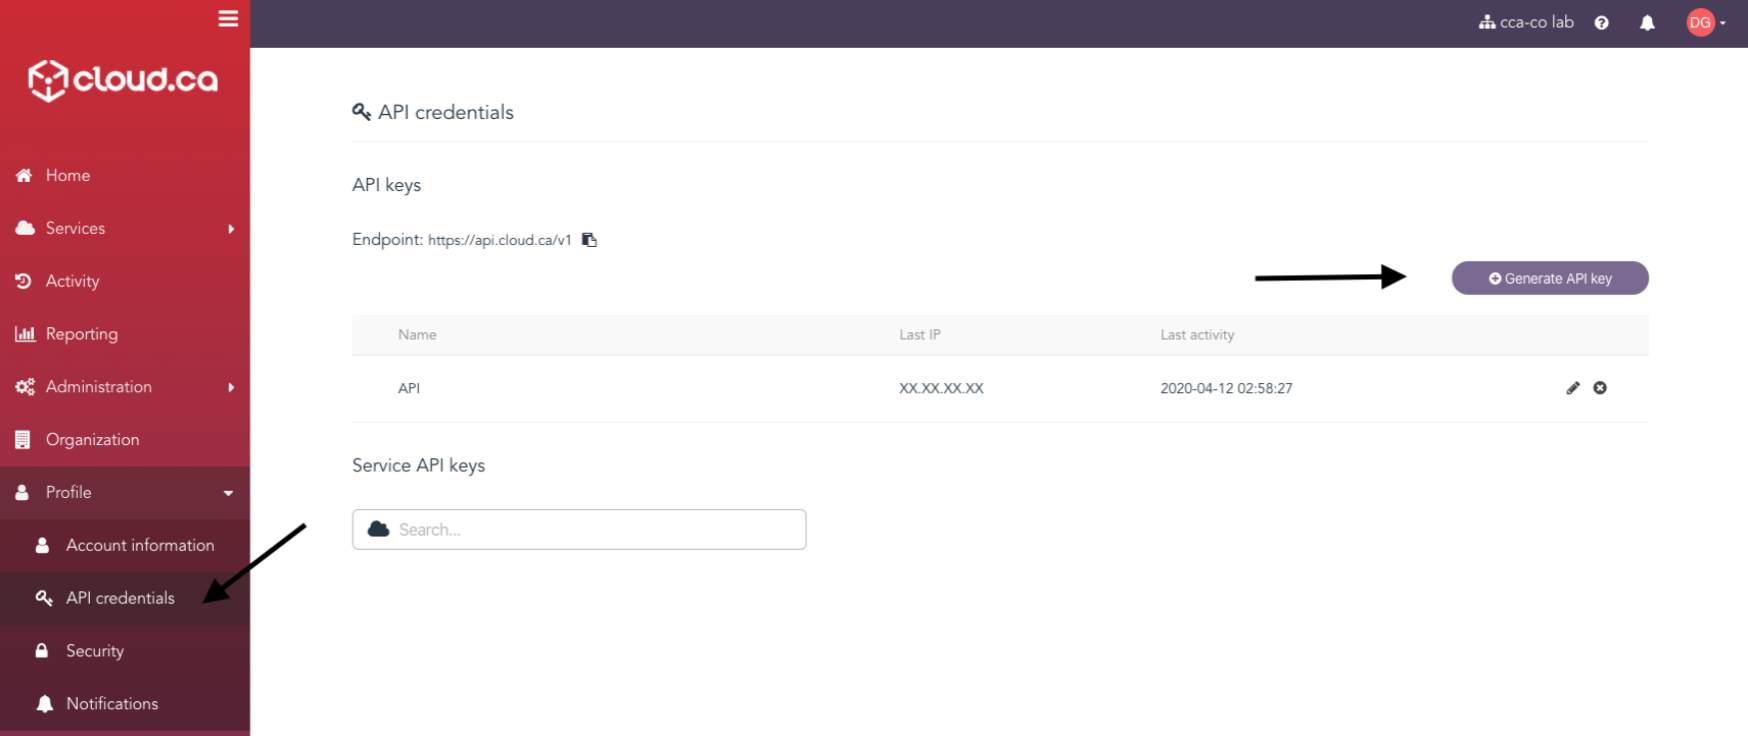
For API key:
Go to profile -> API credentials -> Generate API key.
For environment_id:
Go to services -> <region name> -> click on the right side "More Action" of your environment name and select "Copy environment ID"

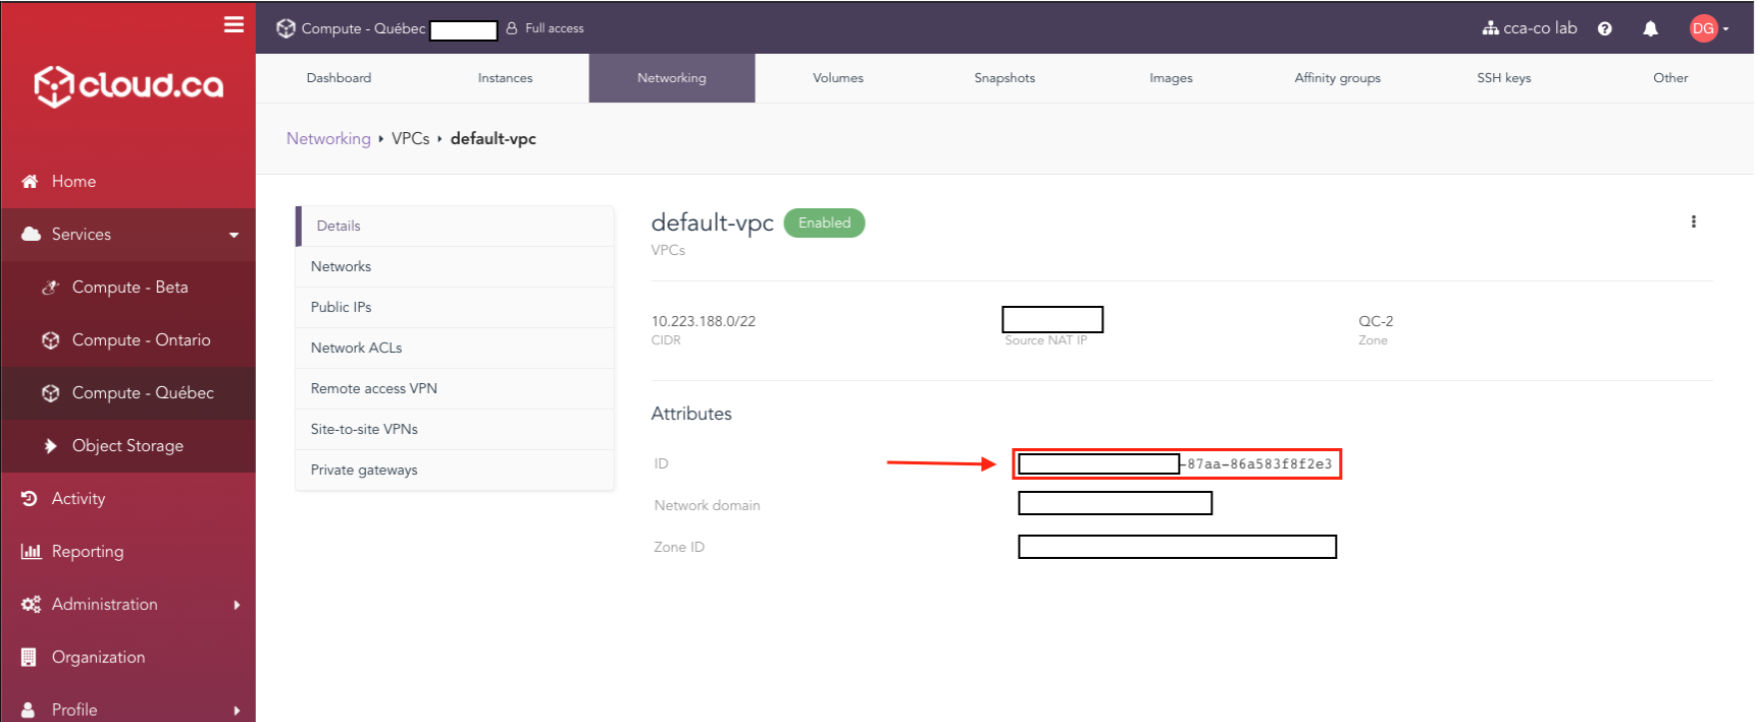
For network_id:
Go to services -> <region name> -> <environment name> -> networking -> click on your VPC -> Networks (in the left menu) -> click on your network -> and collect the first ID under Attributes.
Install Kubectl
Install kubectl command on your workstation to manage the kubernetes cluster, Follow offical documentation: https://kubernetes.io/docs/tasks/tools/install-kubectl/
For mac OS:
brew install kubectl
Terraform Project
Next, clone the Terraform project repository from GitHub:
git clone https://github.com/cloud-ca/cloudca-rke-cluster.gitThen in the terraform project create a file called: terraform.tfvars in the git project directory and place your IDs in there as such:
terraform.tfvars
api_key = "<ID>"

environment_id = "<ID>"

network_id = "<ID>"
Deploy RKE
Validate the Terraform project repository and initialize the Terraform plan with your IDs from the project:
make init plan
Apply the Terraform plan on cloud.ca to deploy RKE:
make apply
kubectl-cli
Once the deployment is completed, test your Kubernetes connection by moving your file ./generated/kube_config.yaml} in the following directory ~/.kube/config and run kubectl get pods -A to see your running pods.
$ mv ./generated/kube_config.yaml ~/.kube/config

$ kubectl get pods -A
NAMESPACE NAME READY STATUS RESTARTS AGE

ingress-nginx default-http-backend-97bf46cd4-wvdh6 1/1 Running 0 159m

ingress-nginx nginx-ingress-controller-67sq5 1/1 Running 0 159m

ingress-nginx nginx-ingress-controller-pj5g5 1/1 Running 0 159m

kube-system canal-jf6hf 2/2 Running 0 159m

...

...
With access to Kubernetes using kubectl, you can now manage Kubernetes resources from your workstation and deploy an application stack.
Updates, Management and OS Compatibility
If you plan on doing any updates or adding a node, do not use the RKE cli, apply the changes using Terraform and re-run the deployment.
Changes to the quantity of nodes for the master/worker nodes can be changed in the file variables.tf, As for OS compatibility, this tutorial use Ubuntu 18.04 template. However if you wish to use different Distro, them you can change the value "template" in nodes/main.tf.
1. Update main.tf
2. Make plan

3. Make apply
And that's how you deploy a simple Kubernetes cluster from Rancher RKE using a cloud.ca plugin for Terraform!
If you have any questions, don't be shy to reach out to Antoine or David.

